The steps to setup and configure an SMTP Server or mail relay on Windows Server 2012 are very similar to those for Windows Server 2008 except for a few differences. Confusion has arisen due to GUI changes in Server 2012, which has led me to create this post to help anyone that requires explicit step-by-step instructions.
Note: The exact steps for installing SMTP Server on Windows Server 2008 can be found in this previous post of mine.
Installing the SMTP feature
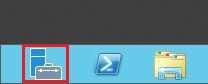
1. Click on the Server Manager icon in the bottom left-hand corner to load the Server Manager Dashboard:
Alternatively, click on the Powershell icon to its right and enter servermanager.exe at the prompt to load the Server Manager Dashboard:
PS C:\Users\Admin> servermanager.exe |
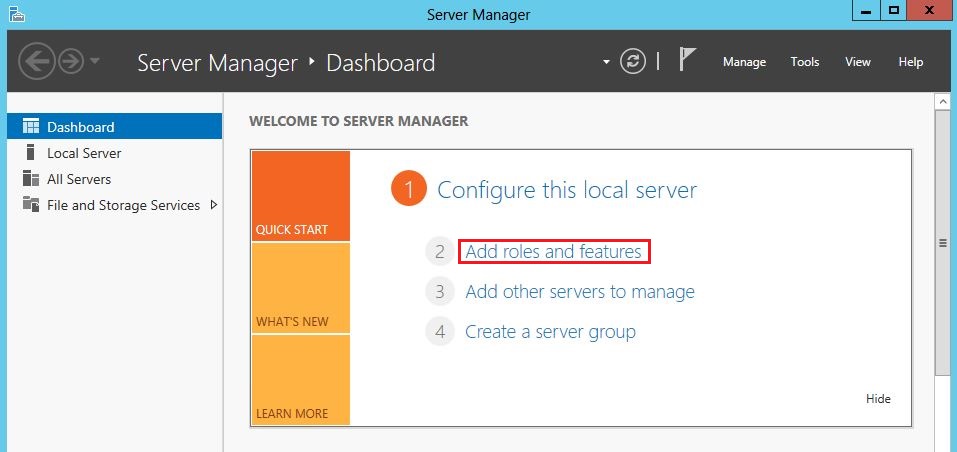
2. When the Server Manager Dashboard loads, click on Add roles and features in the center pane as highlighted below:
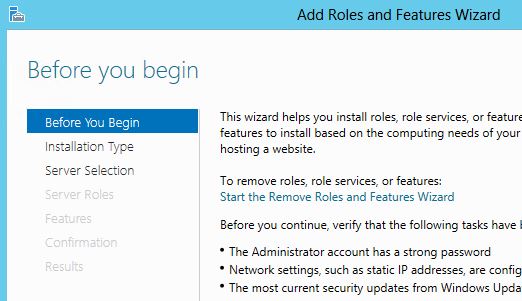
The Add Roles and Features Wizard will load, click Next to go past the initial Before You Begin Page:
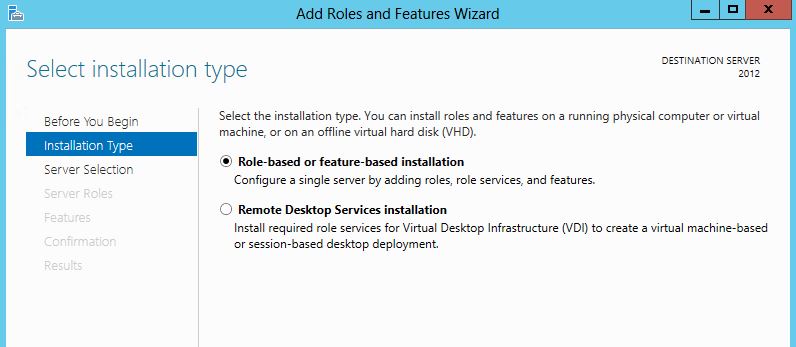
3. In the Installation Type section, select Role-based or feature-based installation and click Next:
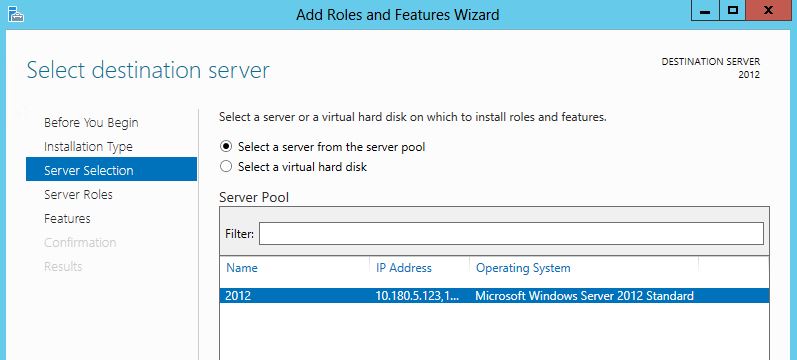
4. In the Server Selection section, select your server, in my example below, my server is called 2012, then click Next to proceed:
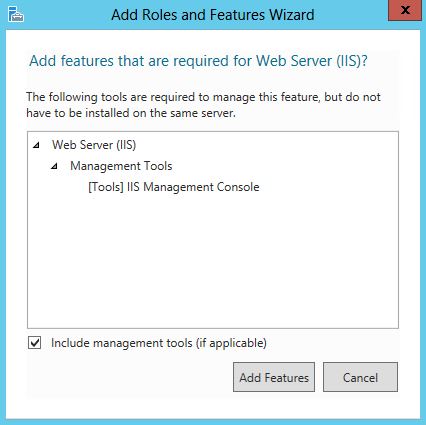
5. In the Server Roles section select Web Server (IIS) as highlighted below and click Next:

Doing so will initiate a prompt to install the required IIS Management Console. Ensure you check the Include management tools (if applicable) box per the below and click Add Features to proceed:
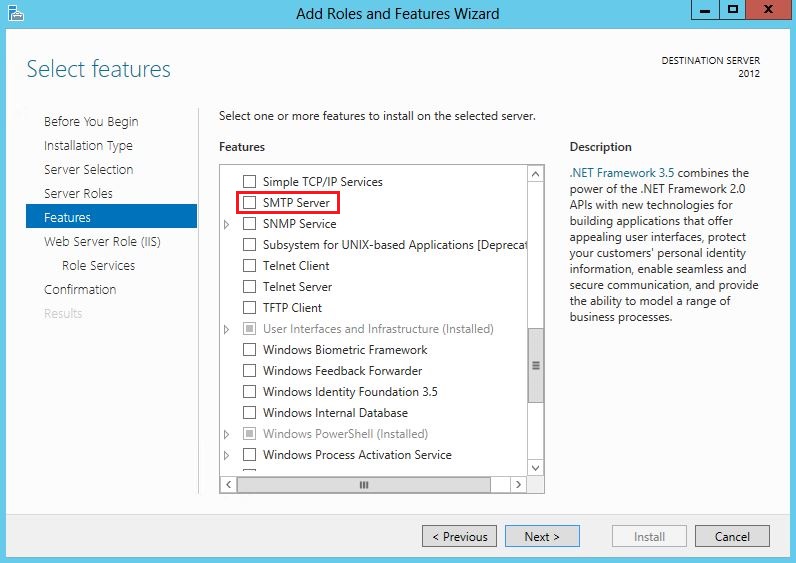
6. In the Features section, select the SMTP Server feature then click Install to proceed:
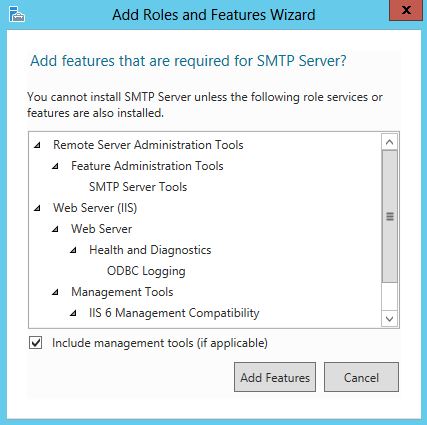
You will prompted to install services and features required by the SMTP Server. Ensure you check the Include management tools (if applicable) box per the below and click Add Features to proceed:
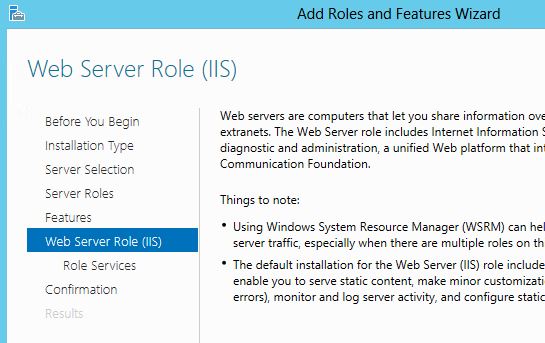
7. You will now be presented with the Web Server Role (IIS) section. Click Next to proceed:
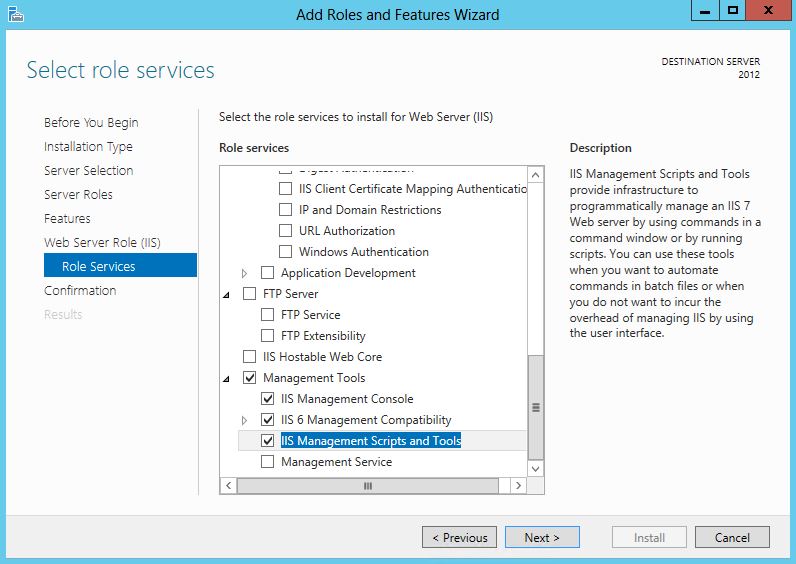
In the Role Services section, scroll down and under Management Tools select the services to match those checked in screenshot below then click Next to proceed:
8. The Confirmation section will show all the role and feature configuration options you previously selected:
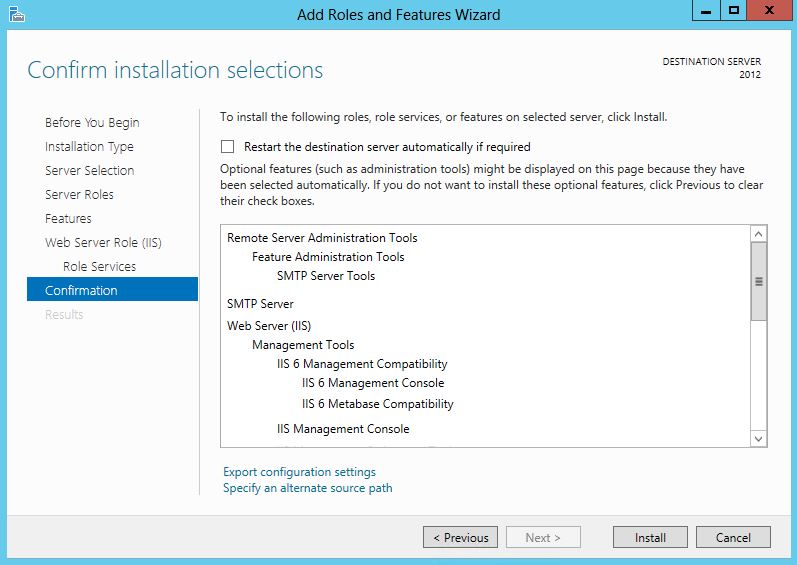
Click Install to start the installation:
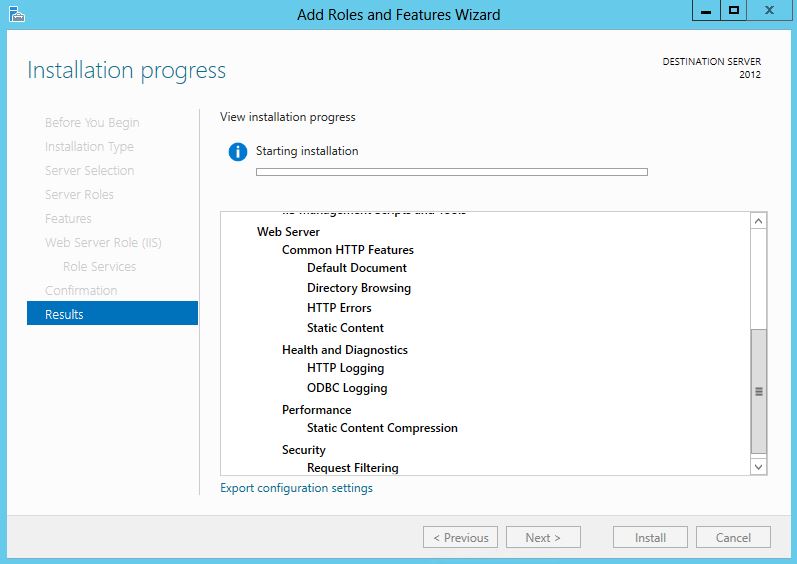
The installation should complete shortly. You nay need to reboot your server to fully complete the installation.
Configuring the SMTP Server
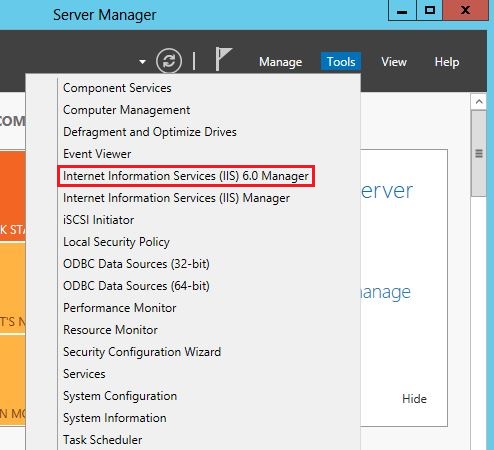
The next step is to configure SMTP. To do so we will need to open Internet Information Services (IIS) Manager 6. 10. Click on the Server Manager icon per step 1 to load the Server Manager Dashboard. Then click Tools and then click on Internet Information Services (IIS) 6.0 Manager to load IIS Manager 6:
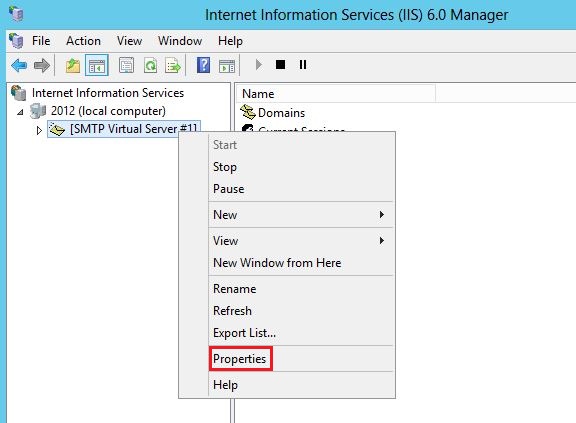
9. In IIS 6 Manager, expand the server name, in my example below it is 2012, then right-click on SMTP Server and select Properties:
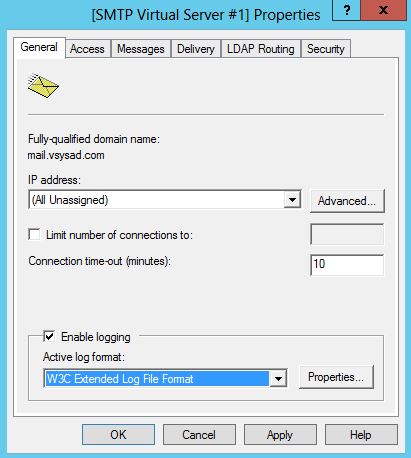
10. In the General tab, unless you want the SMTP Server to use a specific IP address, leave the settings as they are so that the IP address is set to (All Unassigned):
11. To proceed, click on the Access tab:

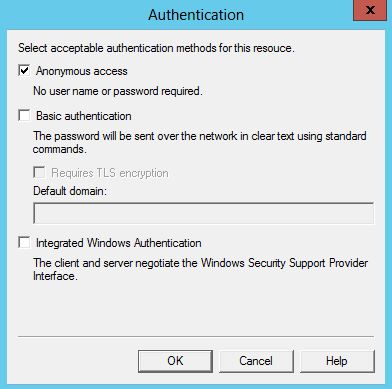
12. Click on the Authentication button and ensure Anonymous access is checked and then click OK:
13. Once back in the Access tab, click on the Connection button. Select Only the list below and then click Add. Enter 127.0.0.1 as the IP address and then click OK:
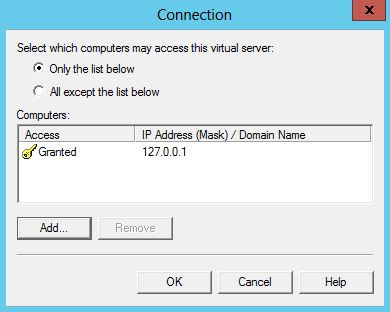
The Connection setting controls which computers can connect to the SMTP server and send mail. By granting only localhost (127.0.0.1) access, limits only the server itself the ability to connect to the SMTP server. This is a requirement for security. Click OK to return to the Access tab and then click on the Relay button. Enter 127.0.0.1 as the IP address and then click OK:
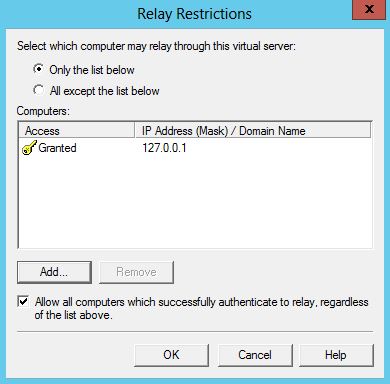
The Relay section determines which computers can relay mail through this SMTP server. By only allowing the localhost IP address (127.0.0.1) relay permissions it means that only the server itself can relay mail. Conversely, it prevents the SMTP server from being an open relay and being used to send unsolicited spam email by other computers on the internet, which could lead to the SMTP server being blacklisted.
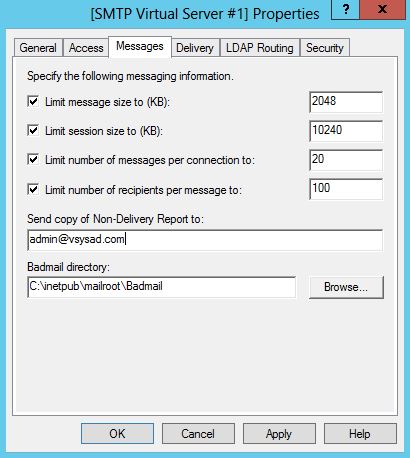
14. Next, go to the Messages tab. Here you can enter an email address where copies of non-delivery reports are sent to. You can also configure the location of the Badmail director, however, the default setting should suffice:
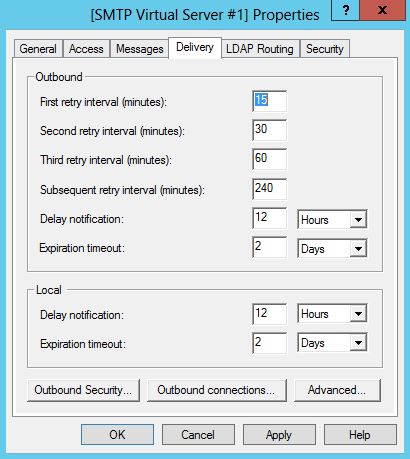
15. Next, go to the Delivery tab:
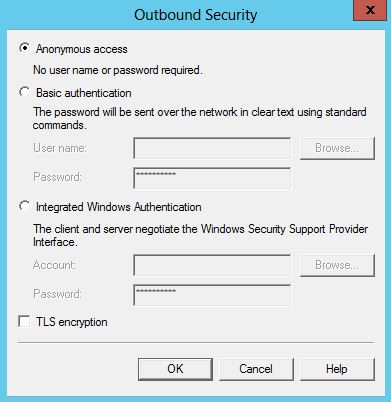
16. Click on the Outbound Security button and ensure Anonymous access is selected. As the only server that can connect and relay mail through the SMTP server is localhost this security settings is fine:
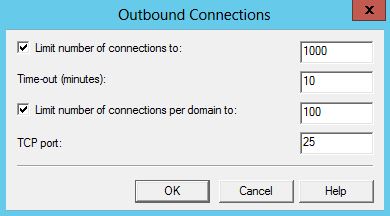
17. Click OK to return to the Delivery tab and then click on Outbound Connections. Leave the defaults as they are:
18. Click OK to return to the Delivery tab and then click on Outbound Connections, then click on the Advanced button:
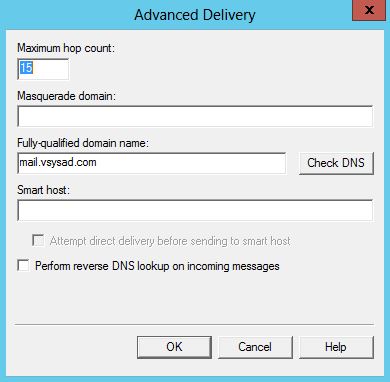
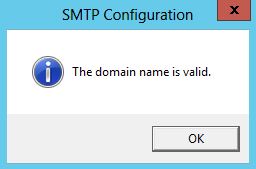
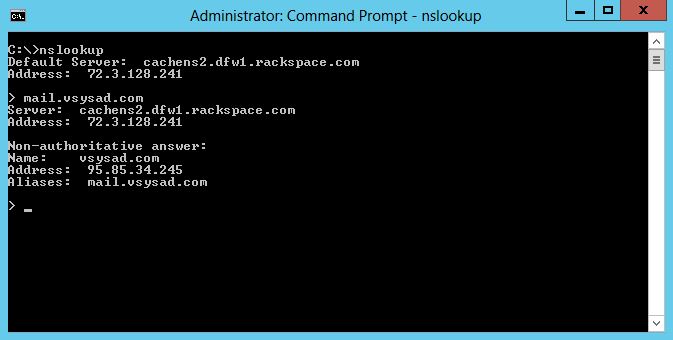
Here you will need to enter the fully-qualified domain name of the SMTP server. This will be the host name or A record that has been created in your DNS zone file. This is straight-forward to do but you will have to confirm how you do this with the party that manages DNS for your domain. I have entered mail.vsysad.com as this is fully-qualified. If you click on the Check DNS button you can confirm whether your chosen name resolves successfully. In my case it does as I see the following:
19. Click OK and then OK again to exit the SMTP Virtual Server Properties. You can also perform this test by running nslookup to confirm the existence of the host name as well as confirming the IP address it resolves to – which should the IP address of your server:
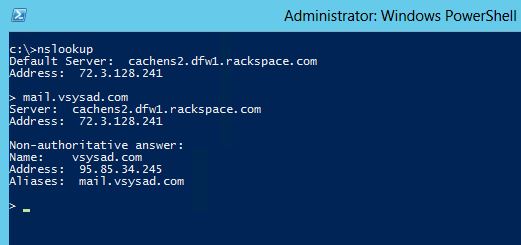
You can also load the nslookup command from PowerShell also:
Please note that DNS is crucial to successful email delivery. If your SMTP server cannot resolve the domains it is trying to send messages to then it will fail. Ensure that the DNS servers you have configured are able to resolve DNS queries successfully. From the above screenshot you can see that the DNS server I have configured, cachens2.dfw1.rackspace.com, was able to successfully resolve my SMTP server’s hostname, mail.vsysad.com. This is one of Rackspace’s many DNS servers and I am 100% confident it works fine.
The reason I am highlighting this is because if your SMTP Server sits within a corporate network it will likely use an internal DNS server. Often these are only configured to resolve internal namespaces therefore resolving external hostnames may fail. Also, firewall rules may block your SMTP Server from querying any DNS servers so please check and ensure DNS queries are resolved successfully and if not make sure it get fixed before going onto the testing phase below.
Another very important point about DNS is that you must ensure that you have a PTR record for reverse DNS lookups configured. The PTR record allows your SMTP Server’s public IP address to be resolved back to your hostname. Some of the major email providers perform revers DNS lookups of mail servers connecting to them as a security measure to check their credibility or reputation. Your web host should have a control panel that allows you to configure reverse DNS if you have a dedicated public IP address. Not having a PTR record will not guarantee email delivery failure but it will very likely delay email delivery and at worst may result in your messages being blocked and your host being blacklisted. I highly recommend you you configure a PTR record for your server.
Follow the instructions in this post which shows you how to verify correct DNS configuration using the SMTPDIAG tool.
20. The last configuration step will be to set the SMTP Service to Automatic so that it automatically starts when the server boots up. Open up the Powershell console and run the command below to enable this setting:
PS C:\Users\Admin> set-service smtpsvc -StartupType Automatic |
Then run the command below to confirm that the service is actually running:
PS C:\Users\Admin> get-service smtpsvc |
Status Name DisplayName |
------ ---- ----------- |
Running smtpsvc Simple Mail Transfer Protocol (SMTP) |
If the SMTP Service is not running the command will return a status of Stopped. If that is the case then run the command below to start it:
PS C:\Users\Admin> start-service smtpsvc |
We are now ready to test the configuration.
Testing the SMTP Server
The next step is to verify that the SMTP server is able to send email successfully. To do this follow the steps below:
21. Create a text file on your desktop called email.txt and paste the following into it, remembering to change the email address information to reflect your own details:
From: blog@yourdomain.com |
To: email@yourdomain.com |
Subject: Email test |
This is the test body of the email |
. |
22. Save the changes to email.txt and then copy the file to C:\inetpub\mailroot\Pickup. The SMTP server monitors this folder and when it detects the email.txt file, it will read the contents and send the email to the address in the To: section. This should happen almost immediately.
23. Check the email address the email was sent to and it should arrive shortly – the email was sent to my Gmail account:

A much easier, alternative way of doing this is to use PowerShell. To do so, launch the console and simply run the command below, ensuring that you complete the sending and receiving email addresses plus the subject and body text:
PS C:\Users\admin> Send-MailMessage -SMTPServer localhost -Toxxxxx@gmail.com -From blog@vsysad.com -Subject "This is a test email" -Body "Hi Japinator, this is a test email sent via PowerShell" |
The above command sent an email to my Gmail account, a screenshot of the email generated is below:

You can save the above command in a file with a .ps1 (PowerShell) file extension and run it whenever you need to test sending/routing of mail.
Apparently there’s more than one way to skin a cat. There’s also another way to test your mail relay server. You can use an email web form application which is similar to a contact us page on a website which allows you to post some feedback, which then uses an SMTP Server to deliver the messages to specific email contacts such as info@yourdomain.com that monitor this information. See this post to learn how to do this using an ASP.NET 4.0 C# email web form application.
That’s all there is to it! Now you have a fully functioning STMP server that can successfully send emails. Many of the companies that I have worked with use this method to send emails generated by their web applications.
If emails are not being successfully delivered you may notice that messages are building up in specific SMTP folders. Visit this post to understand the purpose of each SMTP folder and how to approach issues when messages are queuing up in those folders.
References:
How to test outbound mail flow with a file in the Pickup folder
IIS SMTP Folder Structure and how SMTP service works